Omelette of Pork Mince, Preserved Radish and Spring Onion (Trung Chien Thit Bam)

Serves 2

I am so impressed with the Red Lantern cookbook (Secrets of the Red Lantern, Pauline Nguyen).

Having not cooked from it for a few years, I am back into it and everything I have cooked so far has been quite outstanding; the recipes are clear to follow and the book is generally an excellent read, with many stories behind the authors and the food.

This omelette is great and reminded me of Neil Perry’s Blue Swimmer Crab omelette, not because they are similar in taste, but because of the freshness and lightness of the end-production. The spring onions with the fish sauce and browned pork is just great, surrounded by the fluffiness of the egg.

I had the omelette with sliced green chillis and spring onions, and a bowl of rice on the side.

This should become one of the long-day, too-hard-to-cook-but-should-cook-something recipes in your repertoire.

Ingredients

4 eggs
1/2 teaspoon salt
1/2 teaspoon cracked black pepper
1 teaspoon fish sauce
2 spring onions, white part only, sliced
1 tablespoon oil
1/2 small red onion (I used an eschalot)
2 garlic cloves, crushed
100g minced (ground) pork
1 tablespoon preserved radish (available from Asian Supermarkets, I found a Japanese brand providing a whole, slated radish and chopped it finely)

Method

  1. In a bowl, whisk together the eggs, salt, pepper, fish sauce and sliced spring onions.
  2. Place a large non-stick frying pan over medium heat, add the oil and then fry the onion and garlic until soft and fragrant.
  3. Add the pork and preserved radish and continue to fry until browned.
  4. Pour the omelette mixture into the pan and cover with a lid; foil or a same-size fry pan will do.
  5. Cook until the base is golden brown and the top just set, slide out onto a plate folding if desired and serve.

Moroccan fish tagine with almond couscous

Serves: 4 – 6

As much as anyone loves a three hour slow-braise tagine, there isn’t time on Tuesday night for such extravagance.

Which is why we have some fabulous tagines like this one.

To reduce the calories even further, skip the butter and add a little chicken stock to your cous cous.

Enjoy!

Ingredients

2 tbsp olive oil
1 onion, sliced
2 garlic cloves, finely sliced
½ tsp ground cumin
1 tsp ground turmeric
1/4 tsp ground cinnamon
1 tsp ground coriander
250gm cherry or grape tomatoes, halved
2/3 cup fish stock
½ preserved lemon, flesh discarded and rind sliced finely
16 pitted Kalamata olives
4 x 180gm skinless, deboned gemfish (or blue eye cod) fillets
Sea salt
Black pepper

Cous cous and to serve

2 cups couscous
30gm butter
1/3 cup flaked almonds, toasted

Handful coriander leaves

Method

  1. Heat oil in tagine (or saucepan) over medium heat. Gently fry onions for 5 minutes until beginning to soften. Add garlic and spices and cook for a further 2 minutes.
  2. Stir through tomatoes, stock, lemon rind and olives. Remove half of mixture and place in a bowl.
  3. Season fish with salt and pepper and lay it over the mixture still in the tagine. Top with remaining mixture from bowl. Cover with lid and reduce mixture to medium-low and cook for 12 minutes until fish is just translucent. Scatter coriander leaves on top.
  4. Meanwhile, boil kettle. Pour couscous into large mixing bowl and top with knob of butter. Seasons with salt and pepper. Pour two cups of boiling water over couscous and cover bowl tightly with cling wrap. Allow to stand for 3 minutes.
  5. Fold almonds through couscous and serve the tagine on the couscous with the coriander.

Terry Durack’s Thai Chicken and Basil

Serves 4

This is a Terry Durack recipe from his book Yum, a $1 purchase from St Vincent de Paul. (Seriously, St Vincent de Paul has to be one of the best cook book chains in Sydney!)

Up until I tried this recipe, I had admired Terry Durack as a food critic though had been less impressed by his recipes. Though I am sure that this was about me and not you Terry!

He opens his book with this dish and describes it as one that changed his cooking life just because it is so unbelievably simple; I have to agree that cooking this and tasting it, it really did open my eyes too. Genuinely, like tasting the snow-egg at Quay or eating at Per Se in New York, cooking this recipe really is one of the seminal moments in my cooking life.

It is hard to believe that this recipe could taste combined, complex or even good. Instead, it really is an amazing dish that demonstrates that with only a few of the right flavours, you can produce a wonderful dish without any complaints.

To put it as Terry Durack does, ‘this dish taught me that you could toss things in the wok while half-drunk and without a care in the world, and still be able to feed people without killing them…’

I have always been lazy with this dish and substituted 3 chicken breasts for the a whole chicken (and I’ll keep doing it) and I have altered (as I usually do) the recipe to be slightly easier to follow.

Ingredients

1 small chicken, meat from the breast, thighs and legs removed, sliced into strips
3 or 4 green (or red) chillies, deseeded and sliced into thin slivers
2 tbsp of finely chopped parsley
Bunch of basil leaves, removed from stem
4 tbsp vegetable oil
3 tbsp fish sauce

Method

  1. Heat the oil in a wok and cook the chicken over a moderate heat for a few minutes, then add the chillis, most of the basil and the parsley.
  2. Cook, stirring as you go for another 3 or 4 minutes.
  3. Splash in the fish sauce and stir through.
  4. Add remaining basil and serve with jasmine rice.

Café de Paris Butter

OK, I am going to tread very carefully here and after my brief intro, I am going to revert to a piece I found online many years ago by Franz Scheurer on the topic of Café de Paris Butter.

The reason for treading carefully is threefold:

  1. The original recipe was (and is) a secret and cooked only in one French restaurant in Geneva.
  2. It was so good that apparently the Germans during WWII booked the restaurant out night after night.
  3. There are many interpretations though they are just that; nobody really knows and suggesting that this take on Café de Paris Butter is correct would be dangerous.

Though I think, from what I have read, that this particular recipe is close if not it!

And lordy, of all the butters I have made, it is freaking good.

Don’t be inundated by the extent of the ingredients. Roll up your sleeves and do the hard yards. It freezes and you’ll have the best steaks in town for weeks and weeks.

The excerpt I found by Franz Scheurer:

Created by Freddy Dumont in 1941, specifically to go with sirloin steak, and served in the Restaurant Café de Paris in Geneva, this herb/spice butter was an instant success. So much so that it was almost impossible to get into the restaurant for years. The exact recipe is probably still secret today, and only a few restaurants world-wide are reputed to serve the original recipe, amongst them the Parisian ‘Le Relais de l’Entrecôte’ and the ‘L’Entrecôte de Paris’ and the ‘Café de Paris’ in San Francisco. The original Restaurant Café de Paris in Geneva still exists (albeit under new management) and still has the butter on the menu.

You won’t find a recipe for Café de Paris in Escoffier, Larousse or the Sauce Bible. Nor is it listed in the Oxford Companion to Food, Food Essentials A-Z or in the Cook’s Encyclopaedia. I did eventually find it in the German edition of ‘Der Grosse Pellaprat’, printed in Switzerland in 1966. Interestingly, it closely matches the recipe I have from my father, from his time as a chef at the Savoy in London in 1943.

Surfing the internet it becomes obvious that there are a lot of ‘chef’s versions’ out there, some quite close to what you would expect and some really way-out, like a German hotel chef’s version mounting a herb butter based on thyme, tarragon and parsley with sweetened condensed milk!

In Sydney Café de Paris butter is on the menu at quite a few restaurants and one, Bistro Moncur, is certainly very well known for this dish and their version is superb. 

Below my father’s recipe from 1943:

Beurre Café de Paris

Ingredients

1 kg butter
60g tomato ketchup
25g Dijon mustard
25g capers (in brine)
125g brown eschalots
50g fresh curly parsley
50g fresh chives
5g dried marjoram
5g dried dill
5g fresh thyme, leaves only
10 leaves fresh French tarragon
Pinch ground rosemary
1 garlic clove, squashed then chopped very finely
8 anchovy fillets (rinsed)
1 tbs good brandy
1 tbs Madeira
1 tsp Worcestershire sauce
½ tsp sweet paprika
½ tsp curry powder (Keens)
Pinch cayenne
8 white peppercorns
juice 1 lemon
zest of ½ lemon
zest ¼ orange
12gm salt

Method

  1. Mix all ingredients with the exception of butter in a glass bowl and leave to marinate for 24 hours in a warm part of the kitchen (a slight
    fermentation occurs).
  2. Purée the mixture in a blender and push through a chinois (a sieve to save you looking it up!).
  3. Foam the butter and mix with the purée. Cover and store in the fridge.
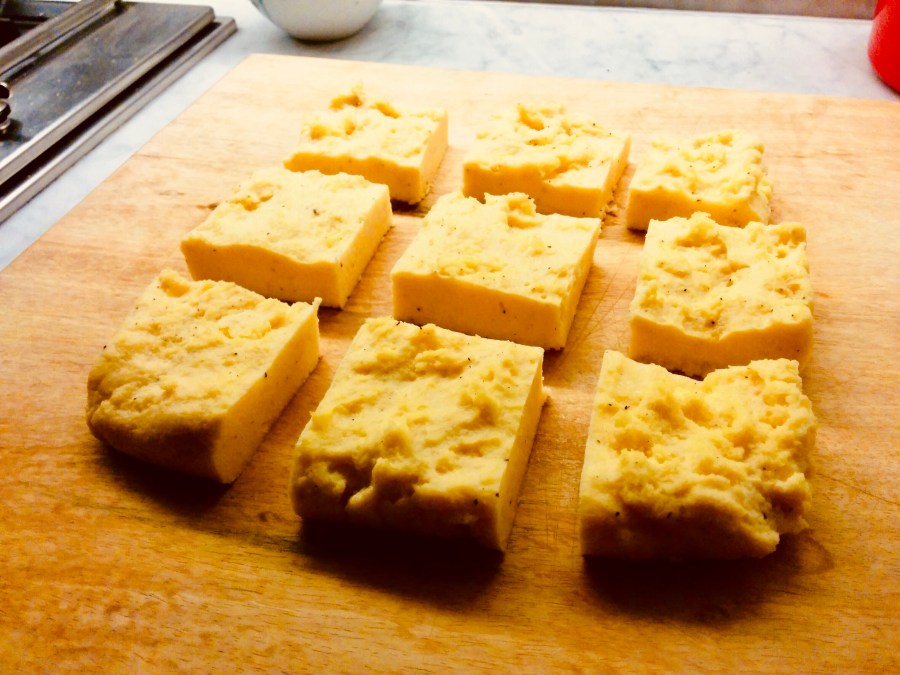
  4. It is customary to form the butter into a log, freeze it and cut off slices as you need them.

Keeps for several weeks.

Upon service a round of frozen butter is placed on the cooked sirloin and put under a VERY hot salamander for just long enough to begin to brown the top of the butter (while the butter underneath stays cold).

Ummmm

Cook your steak, let it sit, slice some of the butter on top and put it under the grill until it starts to melt.

Serve with thinly sliced and baked potatoes and an avocado and watercress salad and Vive la Revolution!

Guillaume Brahimi’s Blueberry Muffins

Makes 12

I’ve cooked a few Guillaume Brahimi recipes and they’re always great. His Roast Organic Chicken with tomato confit, spinach and cauliflower veloute is a very fine, homer French recipe.

I have made these muffins as gifts a few times, especially at Christmas. They’re as good as a bottle of Champagne and as simple as they are, they taste so clean and fresh. The way muffins should be versus the dense centrally-baked stuff you get served in meetings.

These will take you 20 mins to make so just do it. They’re worth every minute.

Oh, the sifting of the flours etc is an important component of this dish and the texture of the muffins so don’t skip it.

Ingredients

1 tbsp lemon zest
½ cup caster sugar
80g butter, melted
1 cup milk
2 eggs
1 cup plain wholemeal flour, sifted
1 ½ cups plain flour, sifted
1 tbsp baking power, sifted
250g blueberries

Method

  1. Preheat the oven to 200c. Combine the lemon zest, sugar, butter, milk and eggs in a bowl.
  2. In a separate bowl, mix the flour and the baking powder. Pour the wet ingredients into the flour mix, then add the blueberries. Stir until it is combined; do not over-mix.
  3. Spoon the batter into lightly greased muffin tins and bake for 15 – 20 minutes, or until a skewer comes out clean. Remove, then cool on a wire rack.

Bearnaise Sauce

Serves: 8

There are a million Bearnaise Sauce recipes online and so here is the one millionth and first; oh, and it is Neil Perry’s.

Of course, the heart of Bearnaise Sauce is consistent across all its recipes so don’t get too excited. This Bearnaise will taste as good as any other classically cooked Bearnaise.

This said, I have had better, though I think that has been more about technique than anything. There used to be a restaurant in Crows Nest called La Grillade that my father took us to when we were kids and just how they got their Bearnaise to be so fluffy, I can only imagine.

But I’m not La Grillade and I don’t make Bearnaise for a living so this is Neil Perry’s version and I commend it to you.

Last time I served this was with a 240-day aged Angus fillet, potato gratin and beans with burnt butter and toasted almonds. You can imagine the effect.

Enjoy.

Ingredients

250g unsalted butter, cut into cubes – bring to room temperature
2 eschalots, sliced
2 tarragon sprigs, 2 tablespoons chopped tarragon leaves
5 whole peppercorns
1/2 cup (125ml) white wine
1/2 cup tarragon vinegar (I substitute white wine vinegar)
3 egg yolks

Method

  1. Heat a saucepan over medium-high heat, add eschalots, tarragon sprigs, peppercorns, white wine and tarragon vinegar and reduce until 1/3 cup (80ml) remains.
  2. Put three egg yolks in a bowl that will sit comfortably over a saucepan. Strain the tarragon reduction and pour over the egg yolks, whisking to incorporate.
  3. Put the bowl over the saucepan of barely simmering water and start whisking.
  4. As it approaches the point at which it is fully cooked, the mixture will thicken by doubling or tripling in size.
  5. Once the sauce is thick, start adding three to four cubes of butter at a time, whisking to incorporate.
  6. When all the butter is incorporated, remove the bowl from the heat, add 2 tablespoons freshly chopped tarragon and check the seasoning.

Neil Perry’s Pan-fried Polenta

Serves 4

If you cook this and serve it with a roast or a braise, it will replace mash as your go-to side. Hands down, money on it.

It is a Neil Perry dish (tick) and it continues (as far as I know) to be served in Qantas First and Business Class (tick). It can be prepared beforehand (tick) and people’s eyes light up when they taste it (tick).

It’s creamy, it tastes great, it sops up all the juices on the plate and it can be reheated the next day.

Tick tick tick.

None of us cook enough polenta. This dish will resolve that for you.

Ingredients

2/3 cup (100g) polenta
1 1/2 cups (375ml) milk
1 cup (250ml) chicken stock
1 teaspoon sea salt
1/2 cup (50g) finely grated Parmesan
50g unsalted butter, chopped well
Freshly ground pepper
Extra virgin oil

Method

  1. Lightly grease a rectangular baking tin (or small baking dish as I did). Line the tin with baking paper.
  2. Bring the milk, stock and sea salt to scalding point (just below boiling point) in a large saucepan.
  3. Gradually shower the polenta into the milk mixture, stirring continuously with a whisk.
  4. Simmer, still stirring for about 40 minutes, or until the polenta is very thick and pulls cleanly away from the side of the pan.
  5. Remove from the heat, stir in the parmesean, butter, salt and pepper to taste.
  6. Spread the polenta immediately into the tin and allow to cool slightly. Cover and refrigerate for about 3 hours, or until firm.
  7. Run a sharp knife around the edges of the tin and gently turn out the polenta. Cut into eight slices thick.
  8. Quickly pan-fry the polenta slices in a little olive oil on both sides until lightly browned.

Jamie Oliver’s Arrosto Misto with Gravy

Serves: 8

This is a really cool roast, bringing together two meats – lamb and duck – and roasting them side by side.

Cool right?

Better still, the gravy that is produced as part of the process is rich and flavoursome and it really is a pillar unto itself in the meal.

The last time I served this up, I served it with pan-fried parmesan polenta and pan sautéed asparagus with balsamic.

Next time, I’d try a cabbage gratin to cut through the richness of the roast; perhaps some buttered beans.

Whatever you serve this with, people will know it is going to be special and that means they’ll bring better wines to dinner.

Cool right?

Right.

Ingredients

4 celery stalks, roughly chopped
4 carrots, roughly chopped
2 red onions, roughly chopped
A head of garlic broken into cloves
A few bay leaves
A small bunch of fresh rosemary separate into sprigs
1.5kg shoulder of lamb
Olive oil
Bottle of red wine (750ml)
1 large (2kg) free-range or organic duck
1 thumb sized piece of ginger
2 tbs of flour

Method

  1. Preheat the oven to 170c.
  2. Divide the chopped vegetables, garlic cloves and bay leaves between two roasting pans. Scatter half the rosemary over the vegetables in one pan, retaining the other half of the rosemary for stuffing in the duck.
  3. Season the lamb shoulder and duck and drizzle with olive oil.
  4. Slice the ginger and stuff inside the duck with the remaining rosemary.
  5. Place the lamb on top of the vegetables in the roasting pan with the rosemary, and the duck on top of the vegetables in the roasting pan without the rosemary. Pour a third of the wine over the lamb, a third of the wine over the duck, retaining a third for the gravy.
  6. Place the lamb in the oven for two hours, checking periodically to see if it is drying out. If so, add a little water; this is important as the vegetables in the lamb roasting dish will make the gravy and so must be moist.
  7. After two hours of cooking, add the duck to the oven and cook for a further two hours. After four hours, the meat should be falling off the bone of the lamb and the duck will be golden and cooked.
  8. Remove the meat from the oven and set aside covered in foil. Add the remaining wine and flour to the sauce and vegetables in the lamb’s roasting pan, and place the roasting pan directly over a medium heat, stirring to combine into gravy. Try to mash up the vegetables. Do not use the duck’s roasting dish for the gravy as it will be too fatty.
  9. Shred the meats and combine on a platter. Serve the gravy in a bowl.

Apple and Cinnamon Galette

Serves: 8

I can’t remember screwing up a dessert and so I don’t know why I don’t do them more.

(Of course, it’s possible that desserts always work no matter what, because butter, sugar, cream, chocolate in any combination and baked any which way are going to be fine!)

When I do cook dessert, I’ve gotten into the habit of doing the dessert early in the morning when I’m fresh and have plenty of time for the entrée and main.

Otherwise, if I did the dessert last, I’d probably never get to it in lieu of getting the meat and vegetables right.

What I have resolved about desserts is that simple desserts can work just as well as sophisticated desserts: whilst I’d love to make a vanilla bean mascarpone ice cream every time to accompany said 17 types of chocolate Gordon Ramsay dessert, a simple tart with some pouring cream is still bloody good.

This particular dessert is very simple and while you probably wouldn’t see it in Gordon Ramsay’s restaurant, you might find it in my bistro if I had one.

Try it. You’ll be very happy you did.

Ingredients

120g digestive biscuits (Milk Arrowroot etc)
1 ½ tsp ground cinnamon
1 tbs plain flour
190g caster sugar
1kg small, sweet apples (I used Fuji, though Pink Lady or Gala would be fine)
40g unsalted butter, melted, cooled
2 tsp vanilla extract
Icing Sugar to dust
Pure (thin) cream to serve

Shortcut Pastry

1 ½ cups plain flour
125g chilled, unsalted butter, chopped

Method

  1. For the shortcut pasty, place the flour and ¼ teaspoon salt in a food processor and whiz together. Add the butter and process until the mixture resembles coarse breadcrumbs. With the food processor running, pour 3 tablespoons iced water in through the feed tube and process until the dough forms a ball around the blade.
  2. Tip the dough onto a board and shape into a ball. Flatten the dough into a disc and tightly enclose tightly in plastic wrap. Chill for 50 minutes until dough is firm.
  3. Preheat the oven to 200c and line a pizza tray or baking tray with baking paper.
  4. In a food processor, whiz the biscuits to fine crumbs with the cinnamon, flour and 1 ½ tablespoons sugar. Set aside.
  5. Peel, halve and core the apples. Slice very thinly into half moons, ideally with a mandolin.
  6. Melt the butter in a large frypan over a medium-low heat. Ad 2/3 cup sugar (150g) and stir to combine. Add the apple and vanilla and cook for 2-3 minutes until the apple is coated and slightly softened. Remove from the heat and allow to cool in the pan.
  7. On a floured board, roll out the pastry into a round, 2-3mm, 28cm ring (or to fit tray); it should be 5cm longer than the end of the pizza tray (or baking tray) so that the pastry can be overlapped a small way back over the apple.
  8. Press the dough into the corners of the tray. Spread the biscuit mixture evenly over the base.
  9. Pile the apple mixture evenly over the biscuit mixture including any juices. Gently fold the overhanging dough over fruit. Sprinkle the remaining 2 teaspoons over the pastry rim.
  10. Bake for 35 – 30 minutes or until the pastry is golden.
  11. Leave to cool for 40 minutes and transfer to serving plate. Sift and dust lightly with icing sugar.

12 Hour Pork

Serves: 8 – 10

My mother first made this dish for the family when I was about 21. It was a revelation!

I had never had such slow cooked meat (remember, this was 15 years ago when slow cooking wasn’t a thing in Australia) and rather than being dry or inedible, it is incredibly moist and succulent.

And unlike all of the pulled porks and beefs out there, this one isn’t just a slab of slow cooked meat. Not at all; the fennel and garlic and chilli transform it into the most unique and extraordinary flavor, unlike anything you have ever tasted.

On one occasion that I cooked it for my flatmate Aaron and our friend Nilhan, we agreed not to eat all day and even spent a few hours in the sun playing tennis (in between bastings) to build up our hunger. I served it with a truffle mash and sauteed beans and I swear to God, it was the most unbelievable eating moment of my life as we stuffed it down with our fingers, eyes closed, heart rates at 110.

It is a bit of a ritual cooking this because you have to start early in the morning and keep basting all day.

Though a few hours in and the house smells amazing. The excitement starts.

People ask to peek the meat at around 8 hours. Start your truffle mash and pour a wine at hour 10 and the excitement is palpable. People refuse cheese and snacks in order to have as much room for the pork when it is served.

It is a long runway but it is worth it. Oh, only use a pork shoulder. Pork neck – as experience told me earlier this year – just will not cut it.

Ingredients

3 – 4kg Pork Shoulder Roast, no bone
4 tbs fennel seeds
5 tbs chopped garlic
3 tbs dried chili pepper flaked
1 tsp sea salt
¾ tsp pepper
Juice of 6 lemons
3 tbs olive oil

Method

  1. Preheat the oven to 250 celcius.
  2. Mix the together fennel seeds, chopped garlic, chili pepper and salt and pepper and set aside. Mix lemon juice and olive oil and set aside.
  3. Stab the Pork Shoulder deeply all over; around 7 times on east side including edges.
  4. Massage the fennel seed mixture into all sides of the roast and place it in a roasting pan. Roast for 30 minutes.
  5. Turn the oven down to 120 celcius.
  6. Take the Pork Shoulder out of the oven and loosen from the bottom of the pan. Pour half the lemon mixture over the roast, loosely cover with foil and out back in oven.
  7. Roast for 12 hours or so, adding the rest of the lemon mixture after 6 hours and basting the pork every hour.